Official Artist
Sean Tierney
Actor
, Screenwriter
, Musician
, Comedian
, Author
1,952,527 views|
2,421
Posts
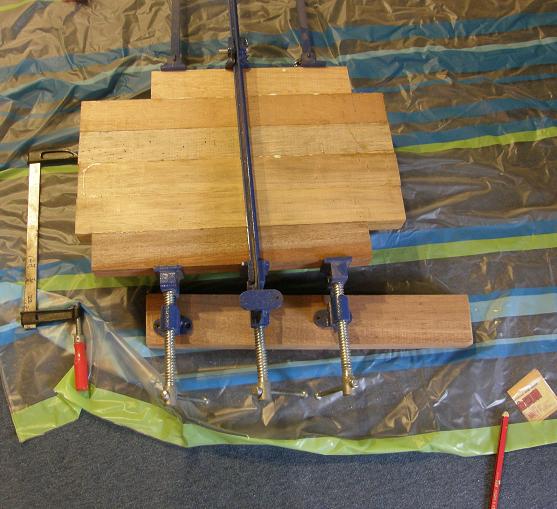
So where were we?
Ahhh, yes, a pile of Lauanall clamped and glued. Overclamped, if anything. If you don’t put the middle clamp on the top/opposite side of the other two, the wood can actually be forced up and out of the clamp.
Or, if you don’t apply the pressure correctly, the wood can end up arced instead of flat. That’s what happened here, since I am not used to Lauan’s softness.
I torqued the daylights out of the clamps when I didn’t really need to. Live and learn. Or so we hope.
Besides, it’s not a problem in this particular instance, as we shall see.
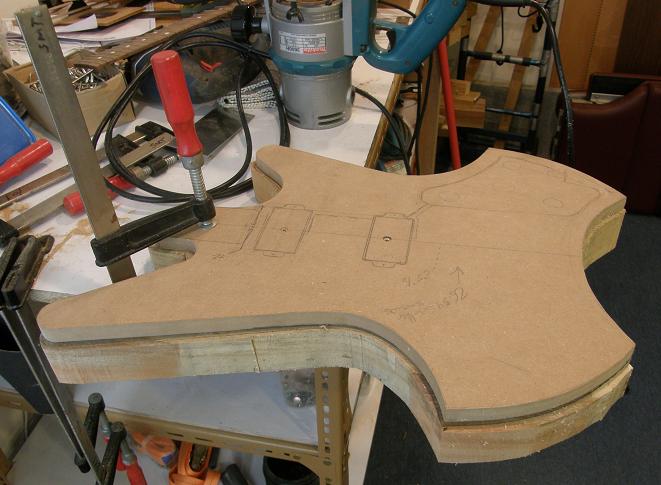
Once the glue dried (i.e. overnight), I took the ‘body blank’ out of the clamps and lined up the template. I used the center wood seam (where the two middle pieces meet and were glued) to line up the center line of the template.
This way, you have a seam line on the body that is a non-removable center line. No worries about erasing or otherwise losing the one critical line in the process!
If you look closely, you can see two holes in the template, in the middle of the pickup locations. I used these holes to screw the template to the body.
I put the screws there because the holes would get routed away later when I remove the wood from the pickup cavities. Even if I went deeper than the pickup cavities, you’d never see it because the pickup would hide it.
Mmmmm, I smell college.
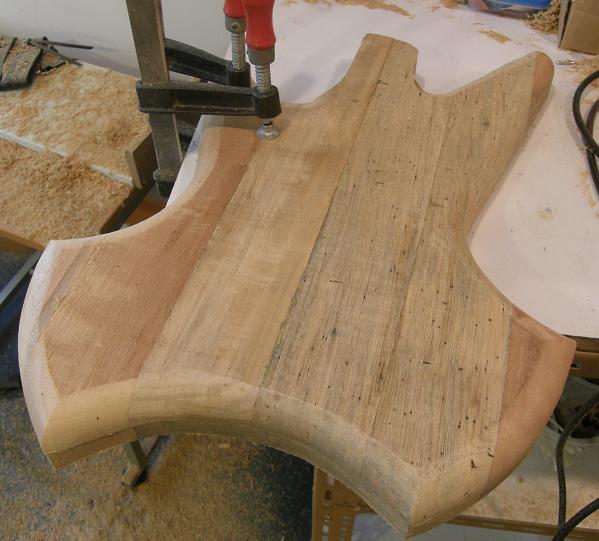
With the template attached to the body, I drew a pencil line around the template, transferring the shape to the blank. Then I took the template off. Why?
Because I cut around the line, as close as I could, with a jigsaw. A ‘rough cut’ to remove the majority of what we might call ‘non-guitar wood.’ No sense imperiling the template.
So a few minutes and a lot of sawdust later, we are here:
Okay, but now what?
Now, we rout!!!
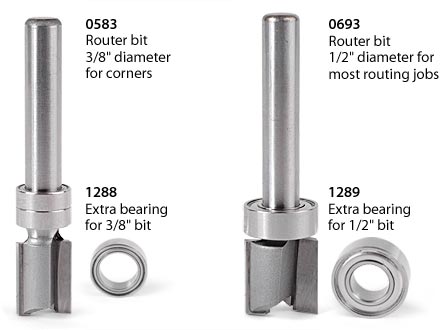
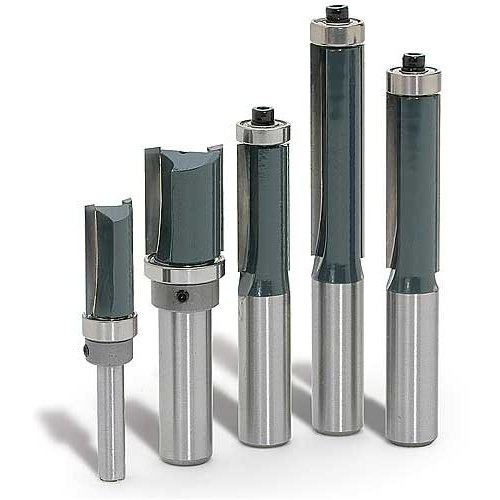
Special routing bits have ball bearings that are the same width as the cutting portion of the bit. This allows you to use a template so that you cut an exact duplicate.
I use bits from Stewart MacDonald, a company that specializes in guitar-making and guitar-fixing tools.
These are the bits:
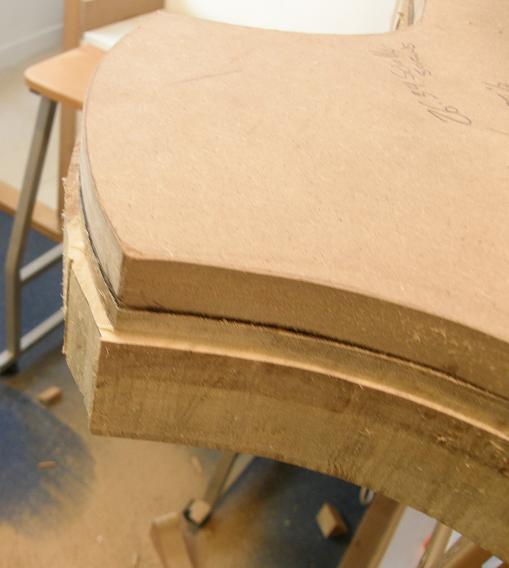
With one of these in the router, I began to remove the excess wood left after I used the jigsaw. Here you can see the general idea. The router follows the template and makes a much smoother cut:
I followed the template all the way around the body, making several complete rotations. Each time I lowered the bit a little, until enough of the body itself had been routed that the bearing would touch the body and not the template. I had to do this because the router can’t extend far enough to do it with the template still attached.
In fact, even without the template, the router still couldn’t reach all the way to the bottom of the guitar body.
Oh no! What to do?
Well, dear reader, luckily for me, flush cutting bits have two types: one puts the bearing above the cutter, and the other puts it below.
So I swapped out the bit in the router. In the image here, the bits on the left are ‘top-bearing’ while the ones on the right are ‘bottom-bearing.’
I flipped the body over. Now the excess wood I needed to remove was on the top and the lower part was already cut flush to the template. Using the bottom bearing cutter, I removed the excess with the ball bearing following the finished part of the edge.
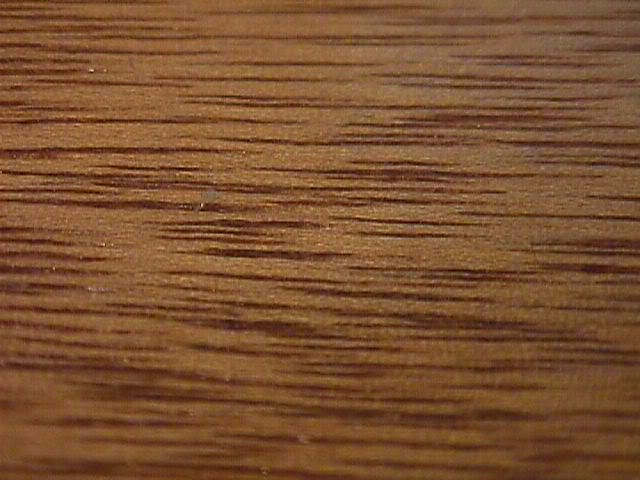
Digression: While this may be of little or no interest to you, let me explain something about wood grain. Wood is made of fibers, and fibers are a lot like hair.
When you look at a piece of wood, you can see which way the grain runs:
In this case, the grain runs horizontally, but more specifically it ‘runs out’ on the bottom edge more than the top edge.
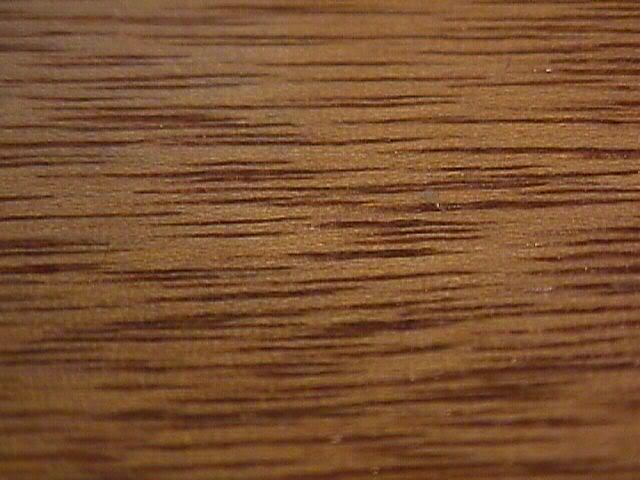
If I was jointing this piece of wood, I would run it over the blade with bottom side of the image/wood down and the left side first. Imagine the image moving to the right over a blade that is spinning clockwise. This way, the fibers are not conflicting with the blade.
Imagine if the grain was opposite. Behold the magic of a flipped image:
If I run that piece in the same direction (right to left), I would get ‘tear-out’ because the blade would catch the ends of the fibers and pull them away from the direction they naturally lay.
It’s like getting your hair brushed in the opposite direction it naturally lies. It’s not pleasant.
This concept is important for guitar making because the body shape tends to go along andacross the grain of the wood.
Routers rotate the bit clockwise at very high speed. You’re supposed to move the router from left to right so that the rotation of the bit doesn’t ‘pull’ the router into the work. That way it won’t get away from you. If anything, it will come back at you! So for safety as well as quality of work, routers are (almost) always moved left to right.
The reality of wood (and woodgrain) makes that occasionally difficult and/or impossible. Guitar bodies have curves, and curves have… ambivalentrelationships with woodgrain. So when you rout the edges, you have to take that into account.
You have to move the router so that the rotation of the blades doesn’t ‘antagonize’ the grain and cause tear-out.
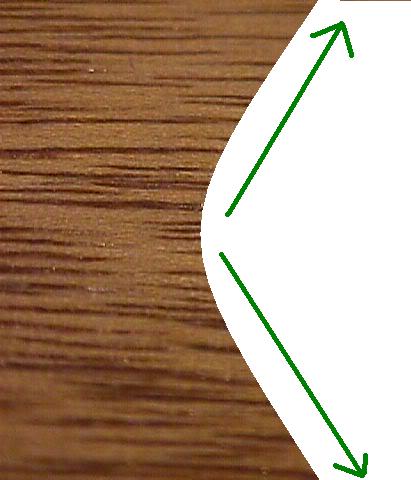
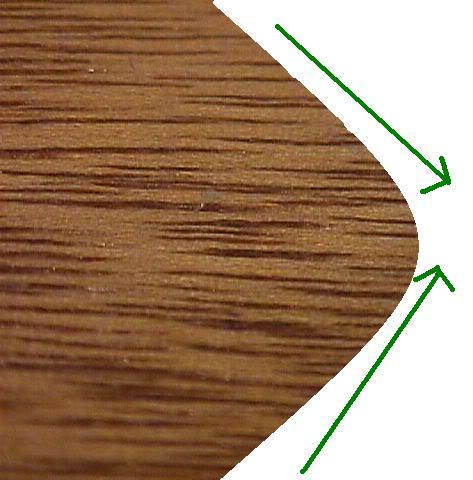
*When following the curve of the outline, you should always follow the grain. That means you can’t always move the router from left to right. Especially on curves, whether inside or outside:*
In the above example, the correct direction of moving the router would cause tear out. So you have to go against the rule but with the grain (pun distended).
Sometimes, you have to go two different directions in a very small space:
This was the case for me on this inside curve:
The same applies to outside curves:
All of this is important to guitar-making because often guitars will have clear finishes that show off the wood, so you have to be very careful not to cause tear outs and gouges that would show up under the finish. Like these:
That’s not my guitar, I just found the photo on the net. But it illustrates the problem.
Speaking of problems, let’s get back to my guitar. End of digression.
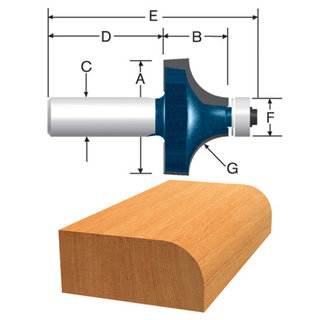
I wanted to ’round over’ the edges of this guitar pretty seriously. Normally, guitars are given 1/8 to 1/2 roundovers, They are done with… you guessed it… roundover bits. Like this one:
Notice our friend the ball bearing.
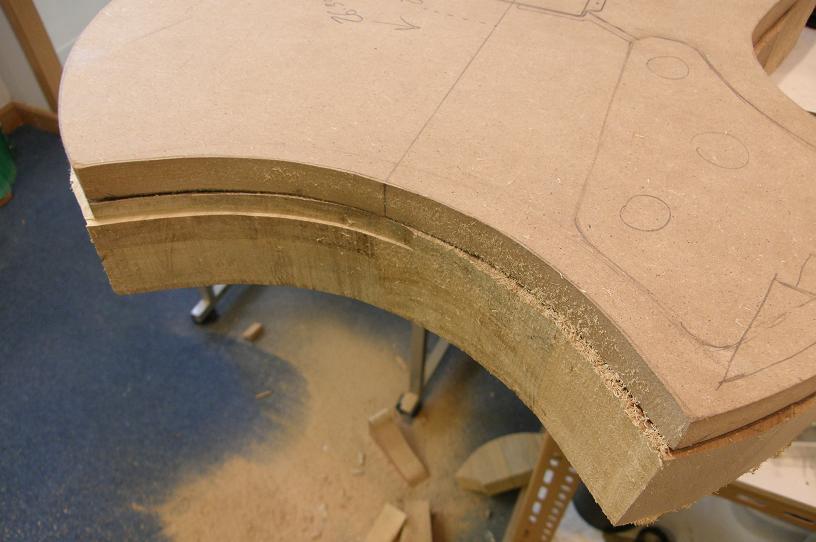
Well, I wanted a bigger roundover for this one. I wanted 3/4″. I have a 3/4″ roundover bit, but there’s a problem:
The baseplate on my router doesn’t have a big enough opening!
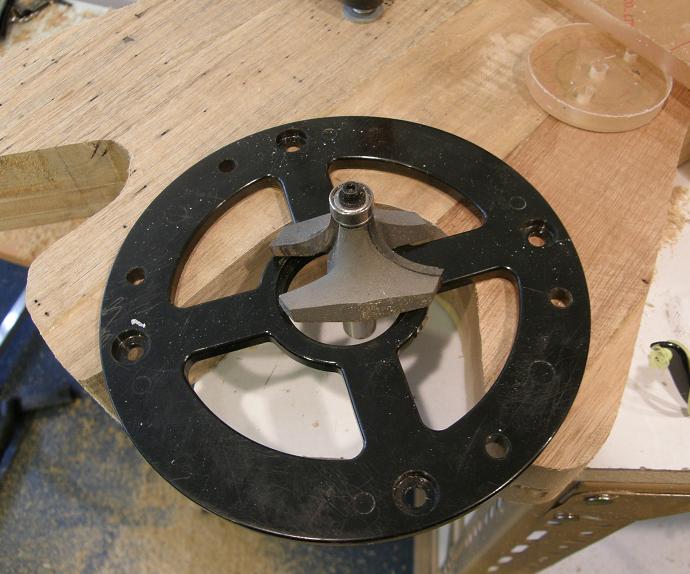
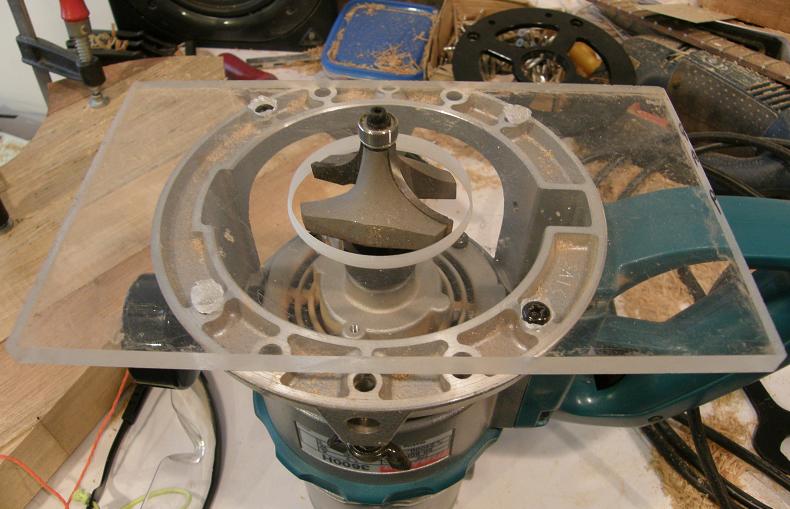
There’s only one thing to do: make a new baseplate.
I have some Plexiglas for just this purpose. I used a hole saw to cut the right size hole in the middle, then drilled some holes for the attachment screws.
Shazam! We have a new base. An added bonus is the increased visibility of the new baseplate.
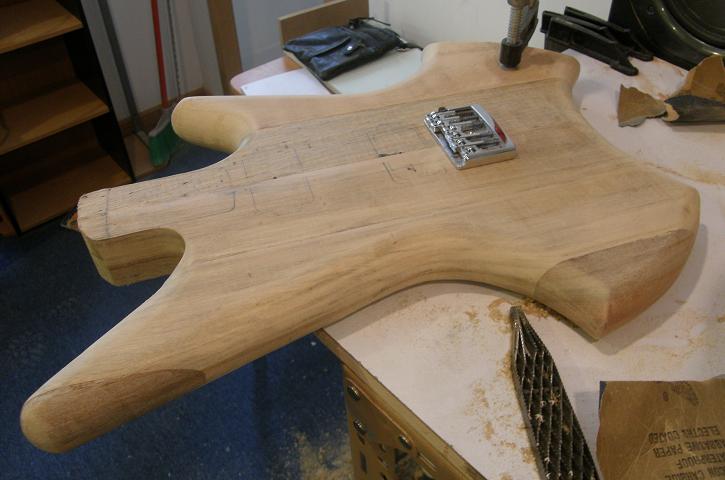
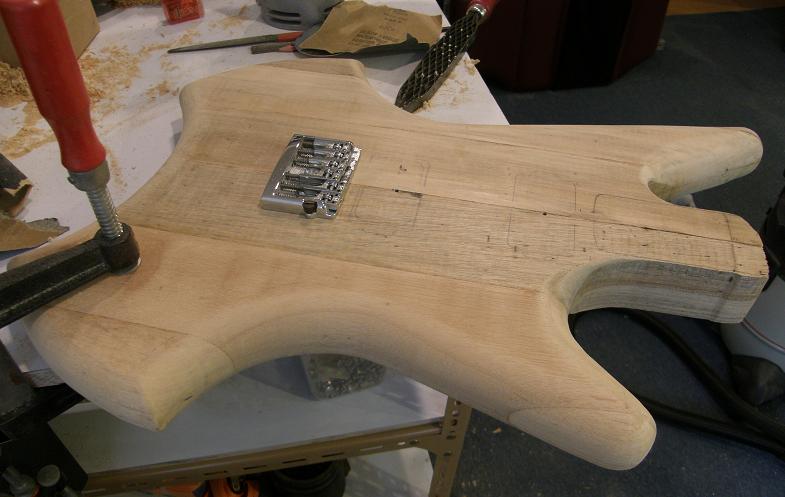
Using this new bit and baseplate, and following the grain (if not always the rules), I routed the body so that the entire thing, front and back, now has a 3/4″ roundover:
I just put the bridge there to see it in place. It’s fun while building to occasionally try to see the finished guitar as much as you can.
Next up: routing some cavities!!!
Just want to take a moment to wish everyone a Happy Chinese New Year! May the Year of the Rabbit be a great one for you!
Kung Hei Fat Choi!!!
If we don't support the movies that deserve it, we get the movies that we deserve.